HOW TO GET THE BEST FROM YOUR IMAGES
Important Note: This
page contains several "Screengrabs". To view the Screengrabs at
their full resolution, download each one by dragging it to your desktop
and then open it in your own imaging program.
Image editing software allows us to make
significant improvements to the apparent sharpness and colour balance and
exposure of the old camcorders.
I used Adobe Photoshop to tweak the old camcorder image, improving the
contrast, colour balance and saturation and sharpness.
Before you start, make sure that you have saved the image. This gives
you the confidence to experiment - if you screw up the adjustments, it's
easy to select 'File' then 'Revert', to get back to the point from which
you started.
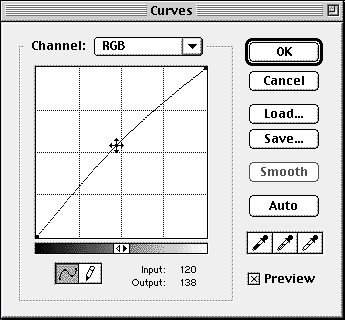 Using Adjust Curves (from the Image, Adjust,
Curves menu - shortcut Ctrl M on a PC, Command M on a Mac) I lifted the
mid tones of the whole image by clicking on the mid point of the RGB curve
and dragging it up and left slightly. Clicking the Preview box ensured that
the effect could be seen immediately.
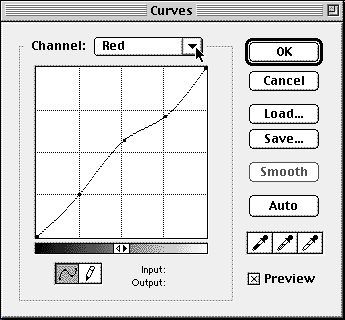
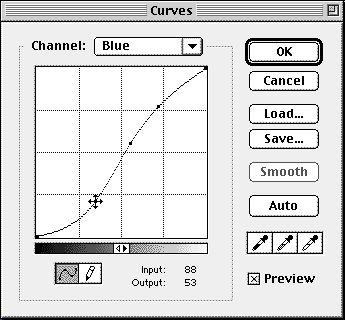
Clicking the triangle to the right of the RGB channel box gives access
to the individual colour channels. Clicking on the individual curves adds
anchor points, which can be dragged up and left to boost the colour, or
down and right to reduce the amount of colour, at any tonal value. I adjusted
the curves for the red and blue, trying to match the overall effect to the
picture produced by the DV camcorder. I managed make the car red but this
lightened the green elsewhere.
At this point I decided to Save the rather complex curve which I had
just made, for future use as a starting point for adjusting other images
from the same camcorder. Just click Load to use the curve again. Not happy
with the effect? Hold down Alt (PC and Mac) and the Cancel button changes
to Reset. But if you're happy, click OK. Save the image, using a different
file name.
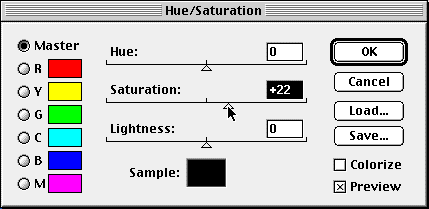
Next I increased Saturation in the Image, Adjust, Hue/Saturation menu
- shortcut Ctrl/Cmd U - by dragging the slider to the right, then clicking
OK. Save the image, using another file name.
Finally, sharpness. As with so many actions in Photoshop, there are a
number of ways of 'sharpening' an image. Experiment with them in the Filter,
Sharpen menu. I found Sharpen alone was not enough, Sharpen Edges even less
and Sharpen More was too much. So I used the advanced method, Unsharp Mask
(USM) which allows you to set your own parameters. Where you set the Amount,
Radius and Threshold sliders is a matter of personal preference but, first,
double click the magnifier tool to display the image at 100% and see the
effects clearly.
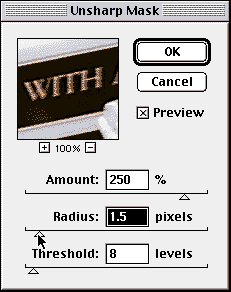 USM works by increasing the contrast
of pixels near an edge in the picture. The three adjustments are interactive,
so it's important to adjust all three before judging the effect. Drag the
slider to select an Amount to determine how much the contrast of the pixels
is increased, Radius to select the number of pixels either side of the edge
which will be affected, and Threshold to select how big the brightness difference
must be between the pixels before sharpening takes effect. Clicking in the
small preview box toggles the preview of the sharpening on and off.
Save, using yet another filename - you can delete the in between files
when you are happy with the result but, until then, they enable you go back
to any intermediate point with ease. This important because Photoshop has
only one level of undo (select Undo in the Edit menu or Ctrl/Cmd Z).
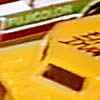
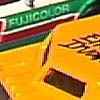
Compare these 'tweaked' versions with the unretouched versions
of the
Left: Sony CCD-V90E Analogue Camcorder and
Right: Sony DCR-PC7E Digital Camcorder on the previous
page.
BUYERS' GUIDE
Win/TV Primio. (Hauppauge Computer Works Inc)
PCI video digitiser card for Windows 95, with built-in tv tuner. Must
be installed inside computer. Requires Direct Draw support. £81 (PC
World). Also available with teletext (£91) and radio (£105).
Website: http://www.hauppauge.com/
UK distributors: Hauppauge UK 0171 378 7309
Snappy (Play Inc)
Digitising device which simply plugs into the parallel (printer) port.
Requires PC with a '486 processor or better, Windows 95/NT3.51 or later
or Windows 3.11, 4MB RAM, at least 8MB of free hard drive space and an unused
parallel port. Delay between the frame you see when you click 'Snap' and
the frame you get is irritating. Version 3 of software, due soon, will reduce
this. Produces good quality stills from good video signals.£95 rrp.
Website: http://www.play.com/
UK distributors: Logitech 01306 734300
PhotoDV (Radius Inc)
Greased lightning has nothing on this kit. You'll never want to go back
to using a slow serial connection between digital camera and computer after
you use Radius PhotoDV to acquire images from a DV camcorder in under two
seconds. PhotoDV uses the new FireWire interconnect standard to connect
to digital camcorders. Adobe Photoshop-type plug-in with FireWire PCI card.
Big 720 x 540 images. Supports PAL (European) and NTSC (USA/Japan) standards,
4:3 and 16:9 aspect ratios. Easy software upgrade (MotoDV) for importing
moving images. Needs PCI Macintosh with MacOS 7.6.1 or later, 16MB RAM,
minimum 10MB free space and Adobe Photoshop 3.0.5. PC users: watch out for
FireWire products from Sony and Panasonic.
Website: http://www.radius.com/
UK distributors: Computers Unlimited 0181 200 8282
Website: http://www.unlimited.com/

This article first appeared in "Digital PhotoFX"
magazine, Issue 2.
IMPORTANT NOTICE
This document is Copyright © 1998 John Henshall. All rights reserved.
This material may only be downloaded for personal non-commercial use. Please
safeguard the future of online publishing by respecting this copyright and
the rights of all other authors of material on the Internet.


 Using Adjust Curves (from the Image, Adjust,
Curves menu - shortcut Ctrl M on a PC, Command M on a Mac) I lifted the
mid tones of the whole image by clicking on the mid point of the RGB curve
and dragging it up and left slightly. Clicking the Preview box ensured that
the effect could be seen immediately.


 USM works by increasing the contrast
of pixels near an edge in the picture. The three adjustments are interactive,
so it's important to adjust all three before judging the effect. Drag the
slider to select an Amount to determine how much the contrast of the pixels
is increased, Radius to select the number of pixels either side of the edge
which will be affected, and Threshold to select how big the brightness difference
must be between the pixels before sharpening takes effect. Clicking in the
small preview box toggles the preview of the sharpening on and off.
