IMPROVING A PORTRAIT
An introduction to some basic Adobe Photoshop skills
by John Henshall
A bereavement is often the first time that people realise that the familiar smiling face they have known for years will no longer be around. It's then that the family album is raided in a bid to cherish fond memories. All too often, only imperfect family snaps remain.
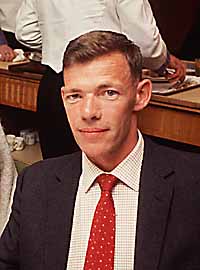
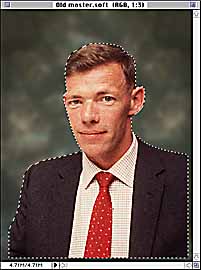
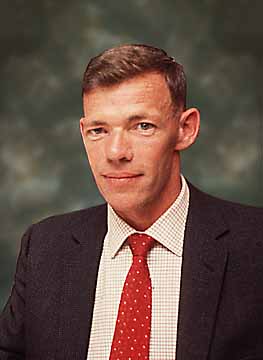
The accompanying snap was taken on transparency film, apparently in a restaurant. It's a good picture of Vic but the background is distracting. So let's get rid of it and turn the picture into a studio portrait.
1. Scanning
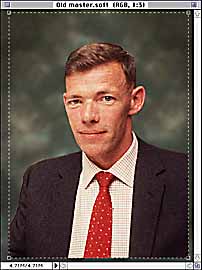
 First we scan the transparency, preferably in a dedicated transparency scanner. We used our Kodak RFS2035 at 2000 pixels per inch, producing an 18MB file, which will be suitable for printing up to 10 x 8 inches. The scanner produces a 72 pixel per inch (screen res) file which gives an image size of 42.667 by 28.444 inches - 3072 x 2048 pixels. Our printer has a fixed resolution of 300 pixels per inch, so the first thing to do is change the resolution to 300ppi.
Select Image>Image Size from the Menu Bar. Up comes the Image Size dialogue box. Check the File Size box to constrain the File Size. The 'Proportions' box should already be checked. Constraining the file size ensures that no extra data will be added - all that will happen is that Photoshop will assign a different number of pixels to each inch. Type '300' over the 72 in the Resolution box. Note that the Width changes to 6.827 inches, the Height to 10.25 inches. Click OK.
2. New background
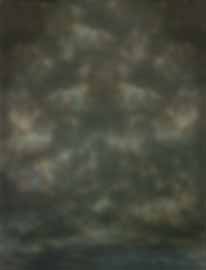 Next we photograph a suitable background in the studio. For speed we used a digital camera. This produces a 4.5MB file of 1524 x 1024 pixels - about half the height and half the width of the main picture. In fact just about any camera would do to capture this - even a 640 x 480 pixel consumer camera - because the background will be blurred. We are not looking for definition. Use the Image Size dialogue box again, this time with File Size unchecked, to make the background the same size as the main image. Note that the file size jumps to 18MB. This is 'res-ing up' the background image. There is no danger of being able to see any artifacts as we will soften the background further using Filter>Blur>Gaussian Blur and entering a Radius of around 5 pixels - the exact amount is not important, the preview box gives instant feedback of the amount of blur.
3. Making a Selection
 We must now differentiate between the parts of the original image which we want to retain and those we want to discard. Photoshop offers many ways of making selections - we'll use the simplest and most intuitive until we are more experienced.
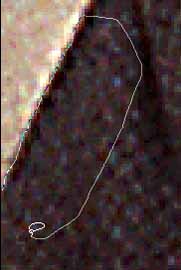
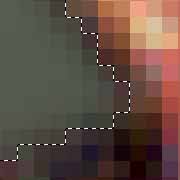
Select the Lasso tool (L), position the pointer, click and hold the mouse button, and start to draw a line around the subject's jacket, face and head. You will find this easier if you invested in a graphics tablet, though with a steady hand, you can do it with a mouse. Don't attempt to draw round the whole of the body in one go. Use the Zoom tool to describe a box around a small area of the image. That section immediately zooms up to fill the screen. With the image magnified it's much easier to make the selection accurately. Do just a bit at a time, circling round towards the start. When you release the button, the ends join up.
Use the Hand tool to scroll to the next part of the image. This time, press and hold down the shift key and start your new selection from a point within the first selection. Using the shift key adds the new to the earlier selection. If you make a mistake, stop immediately. Then press Command+Z to undo the last action. If you select an area you shouldn't, press and hold the Command key while using the pointer to shave off the unwanted part.
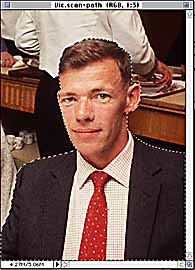
You'll soon get the hang of it, though you will also learn that this process is labour intensive - the computer cannot make the selection automatically on this image. Eventually, you will have built your selection, step by step, to cover the whole of the figure. The 'Crawling Ants' show the selected area - note that they also run along the bottom of the image and part way up the left and right sides to complete the path all around the selected area.
Now save your selection without delay. From the Menu Bar select Select>Save Selection Click OK. If you ever lose the selection you can now get it back via Select>Load Selection


Now hold down Command and tap the 4 key. The black and white outline you see is your new 'Alpha' channel, very useful for special effects. You can work on this channel - or the Red (Command+1), the Green (Command+2) or the Blue (Command+3) - independently. For example you could blur the alpha channel to blend your selection gradually - like cutting out with feathered scissors.
4. Cut and Paste
 Now that we have our selection, go to the Menu Bar and select Edit>Copy (Command+C). This copies your selection to the computer's RAM. Now click on the new background image to make it 'live'. Select Edit>Paste (Command+V). As though by magic, the selected and copied subject appears over the new background!
Note that the crawling ants are still there. Select>Hide Edges (Command+H) will make these invisible, allowing you to see how well your selection suits the background. You can still shave pixels off the selection by using the Command key while shaving pixels off, though you can't add any pixels from the original image quite so easily.
The floating selection can still be moved around on the background (if the background is bigger than the foreground) by using the Move Tool (V). When you're happy with the position, click outside the selection. The crawling ants disappear and the position is fixed.
Before you do that, take a close look at the join of subject and background. Notice the difference in texture? The original has quite a lot of grain but the new background has been blurred and has no grain.
5. Adding noise.
We can add grain to match the texture of the background to the foreground image. In digital imaging we call it adding 'noise'.
At the moment only the foreground is selected. We now need only the background. Fortunately, it's easy to reverse the selection. From the Menu Bar go Select>Inverse.The selection becomes everything that was not selected before. It's that easy.
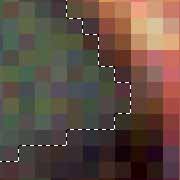
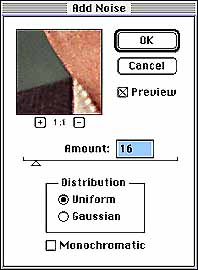
Now select Filter>Noise>Add Noise Move the pointer over the join between background and foreground of the image. Experiment with the settings for Uniform, Gaussian, Monochromatic and Amount until the noise you introduce into the background matches the grain in the foreground. I found an Amount of 16 Uniform to be right for this image. Click OK.
6. Cropping
In my example the background is slightly larger than the foreground. Use the Crop Tool to trim off the extra background. Save your work. Job done.
The basic skills you have now acquired can be combined together and built on to enable you to tackle more complex jobs in the digital Lightroom. Combined with established techniques, digital imaging could soon begin to earn its keep and provide a welcome increase in business.
Exciting and potentially profitable.


This review first appeared in "John Henshall's Chip Shop" in "The Photographer" November 1996.
IMPORTANT NOTICE
This document is Copyright 1996 John Henshall. All rights reserved.
This material may only be downloaded for personal non-commercial use. Please safeguard the future of online publishing by respecting this copyright and the rights of all other authors of material on the Internet.

