Ultimatte and Other Great Techniques
by John Henshall
 The
replacement of photographic backgrounds by electronic means
started way back in the days of black and white television
but really came into its own when colour came along in the
1960s.
The
replacement of photographic backgrounds by electronic means
started way back in the days of black and white television
but really came into its own when colour came along in the
1960s.
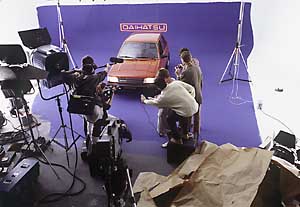
A technique called Chromakey enabled in-picture switching between one camera shooting the foreground to another camera, shooting the background. Wherever the foreground camera saw a particular colour, it switched to the background. Actors worked in sets painted in primary blue, enabling them to be cut-out electronically and superimposed on any other background - an old painting, Sydney harbour bridge, even the moon - giving the viewer the illusion that the performer really was in the distant location. Experienced viewers could see the tell-tale signs - blue fringes around the fine detail of hair. And all too often you didn't have to be an experienced viewer to see the blocky cutout.
An effect which is noticeable or obtrusive immediately destroys an illusion. Well defined edges didn't pose a problem for early Chromakey, the big giveaway was fine detail, especially hair. Brylcream was a partial solution, though it could not be applied to ladies with bouffant hairstyles. Here the television camera just did not have good enough resolution to discern all the tiny bits of blue background seen through each strand of hair, so it just bottled out leaving a crude cut-out around the hair, with bits of blue showing through.
Blue is chosen as a key colour because there is no blue in the human face. Green became an alternative, used if the performers needed to wear blue garments. But whatever colour is chosen, it has to be avoided in the foreground subject. Technicians walking about the set in blue jeans cause great hilarity when their trousers vanish…
 Another
difficulty is the lighting. The blue has to be intense and
evenly illuminated in order to produce a good key signal.
The bland softlight this necessitates doesn't help the
Director of Photography convey mood through dramatic
lighting.
Another
difficulty is the lighting. The blue has to be intense and
evenly illuminated in order to produce a good key signal.
The bland softlight this necessitates doesn't help the
Director of Photography convey mood through dramatic
lighting.
Chromakey never quite looked real. No shadows were cast onto the backgrounds, so foreground objects looked as though they had just been cut out and stuck on. In effect, that's precisely what had happened - electronically.
The coming of computer manipulation software brought similar techniques to stills photography. Initially these were expensive high-end dedicated systems operated by bureaus. Then the arrival of Adobe Photoshop brought the facility to every desktop Apple Macintosh computer.
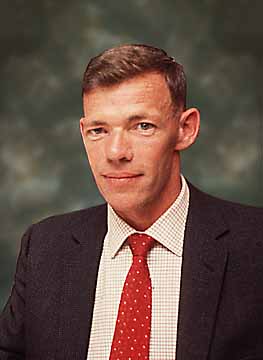
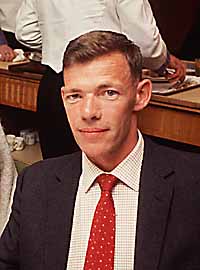 The
accompanying old 'snap' was taken on transparency film,
apparently in a restaurant. It is the last treasured picture
of someone's late father but the background is distracting.
Photoshop enables us to turn the picture into a studio
portrait, or to place the man into any setting we wish.
The
accompanying old 'snap' was taken on transparency film,
apparently in a restaurant. It is the last treasured picture
of someone's late father but the background is distracting.
Photoshop enables us to turn the picture into a studio
portrait, or to place the man into any setting we wish.
The first task is to differentiate between the parts of the original image which we want to retain and those we want to discard. Photoshop offers many ways of making selections - the simplest and most intuitive being the Lasso tool. All that's needed is to position the pointer, click and hold the mouse button, and start to draw a line around the subject's jacket, face and head. This is easier using a graphics tablet, though with a steady hand it can be done with a mouse. There's no need to attempt to draw round the whole of the body in one go. With the image magnified it's much easier to make the selection accurately doing just a bit at a time, circling round towards the start. When the button is released the ends join up.
The Hand tool is used to scroll to the next part of the image. Pressing and holding down the shift key before starting an additional selection, from a point within the first, adds to the original. If a mistake is made, pressing Command+Z undoes the last action. Any area selected accidentally may be shaven off by pressing and holding the Option key while using the pointer to shave off the unwanted part.This process is easily understood but labour intensive - the computer cannot make the selection automatically on this image. Eventually, the selection will have been completed, step by step, covering the whole of the figure. The 'Crawling Ants' dotted line indicates the selected area - note that they also run along the bottom of the image and part way up the left and right sides to complete the path all around the selected area.
The selection may be saved from the Menu Bar by choosing Select>Save Selection, then clicking OK. This selection is then saved to disc, along with the main image, when the file is saved. If the selection becomes deselected it may be retrieved using Select>Load Selection.
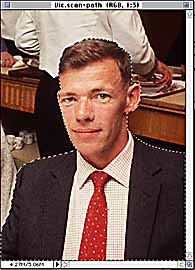
Left: Making the Selection. Right: Choosing a Suitable Background
Holding down Command and tapping the 4 key shows a black and white outline known as the 'Alpha' channel - a very useful selection for special effects. For example the alpha channel may be blurred to blend the selection gradually - like cutting out with feathered scissors.
Next, a suitable background is required. This may be shot or painted specially, hired from a library, obtained from a backgrounds and textures CD such as those supplied by PhotoDisc™ or constructed digitally using packages such as KPT Bryce or Convolver.
It's easy to photograph a suitable background in the studio. Even a low resolution digital camera may be used. The image may be interpolated to be the same size as the foreground image, and then blurred. We are not looking for definition here: in fact a lack of it will help to separate foreground from background.
The selection is copied into the computer's memory using Edit>Copy (Command+C). After clicking on the new background image, to make it 'live', selecting Edit>Paste (Command+V) places the copied subject over the new background.
Pixels may still be removed from the selection by using the Option key while 'shaving' pixels off - though pixels from the original image cannot be added quite so easily.
 The
floating selection is on a separate layer, floating above
the background as though on a piece of transparent film. It
can still be moved around over the background by using the
Move Tool (V). When the position is right, the image is made
into a single layer using Flatten Image in the Layers
palette.
The
floating selection is on a separate layer, floating above
the background as though on a piece of transparent film. It
can still be moved around over the background by using the
Move Tool (V). When the position is right, the image is made
into a single layer using Flatten Image in the Layers
palette.
The result will probably be preferred by his loved ones. But this kind of bland background can sterilise a picture, replacing a real location background with an anonymous virtual one. And the Photoshop selection technique outlined is the most basic, giving results similar to the old television Chromakey.
The Lasso tool (W) can make selections easier, especially if the area to be replaced is of uniform tone which differs from the area to be retained. The best way is to draw a path around the object using the Pen tool. Some find this a more difficult technique to master, though it's worth persevering because it is very easy to modify the selection after it has been made.
The new Photoshop 5 has 'Magnetic' Lasso and Pen tools which snap to the edge of the object without selecting it accurately. Although accuracy depends on how clearly the edge of the object is defined, this new feature does speed selection, even if a little manual assistance is required to adjust the selection.
If you'd like to know more about how this portrait was created, check out IMPROVING A PORTRAIT in the EPIcentre library.
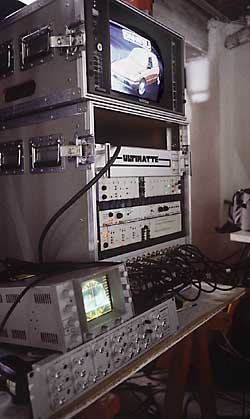
Back in the world of film and television, the problem of seamless blending of foreground objects into new backgrounds was solved by the Ultimatte Corporation, a world-leader in blue screen technology for over twenty years. The first Ultimatte units were analogue "black boxes" which evolved into the advanced, real-time digital hardware and computer software products of today.
Unlike Chromakey, Ultimatte is not just an electronic switch which combines images by swapping between them. Ultimatte is a gradual, linear device which mixes in differing levels of the background image, depending on the levels of blue light it sees. In this way, Ultimatte can also handle shadows and transparency.
A few years ago, Ultimatte developed PhotoFusion, a software version of their moving image hardware. This is supplied as a Photoshop plug-in.
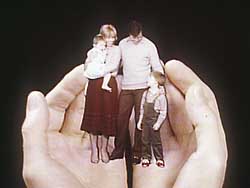
In the accompanying illustrations, the girl with the net is to be superimposed as a giantess, caught in the act of netting the snake on top of the toy store.
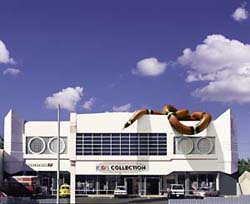
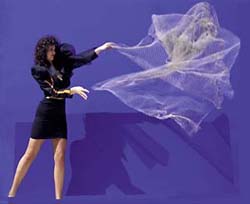
First the background was shot in the required lighting conditions. The foreground image was set up later in the controlled conditions of the studio. To make the illusion 'real' a shadow of the giant model is required, running up the front of the building. This is achieved by cutting card, painted in special Ultimatte blue paint, to the shape of the roof line and positioning this behind the model. Lighting is adjusted to match the angle and contrast ratio found during the photography of the background.
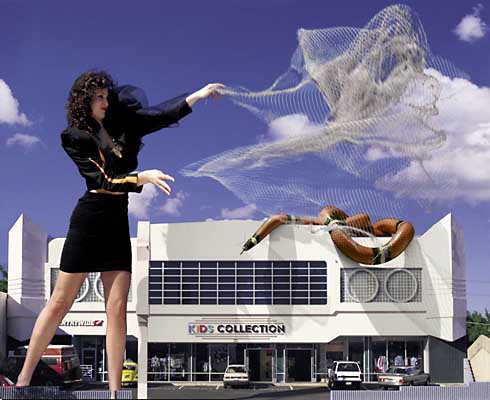
If you followed the detailed steps above for the simplest method of selecting the foreground, you might now be tempted to run a mile in fright at the prospect of combining these images and shadows. How long would it have taken to select all that with the manual tools in Photoshop? Fear not - for $695 PhotoFusion will make light of this and save hours of painstaking work.Like its moving image brother, PhotoFusion can composite still images seamlessly, whilst retaining fine details in hair and net, the transparency of smoke and other objects such as glass, water, soft edges and shadows. PhotoFusion generates a high quality matte which mixes in just the right amount of the background, resulting in a totally convincing illusion of reality.
David Bailey has been quoted as saying, "I am not interested in manipulated images… If I see one more Magritte-type, girl - floating - through - the - sky - with - wings - riding - on - a - banana, I am going to spew." He's right, digital backgrounds have already become cliché. But an art director was heard to remark that, instead of flying a photographer Club Class to San Francisco to photograph a car, he proposed to shoot the car in blue screen and drop it into a stock shot of Golden Gate Bridge. If you're going to lose out on the Air Miles, at least you might as well pitch for the car shot and digital comping. This technique is here to stay.
The art of deriving matte signals is one of continuous refinement. We can reveal that, at Seybold San Francisco on the 31 August, Ultimatte President Paul Vlahos will unveil Ultimatte 'KnockOut' which will be available immediately.
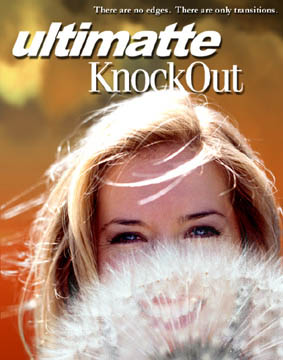
'KnockOut' is a radical new approach to generating masks, without requiring a blue screen. But Ultimatte 'KnockOut' is more than just a mask creator: it separates the object from its background, removes background colours in transparencies and preserves shadows. Ultimatte claims that it generates more realistic results than any other method.
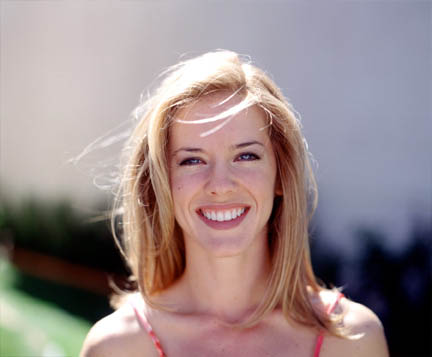
Original photograph. Note that the background is not against blue screen.
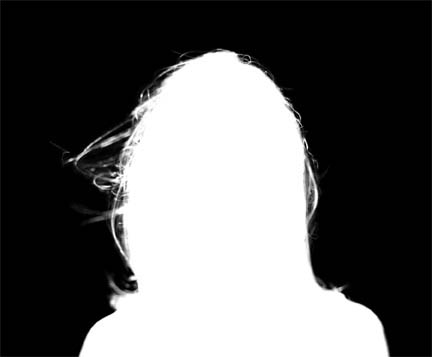
Alpha channel derived from above using Ultimatte KnockOut
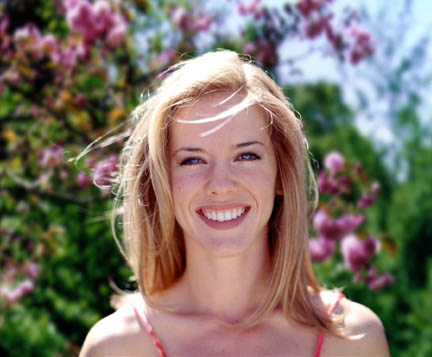
Foreground subject matted into another background using Ultimatte KnockOut and Adobe Photoshop
USEFUL CONTACTS
|
Adobe Photoshop 5 Adobe UK Ltd 0181 606 4039 |
FotoFusion Ultimatte Corporation (California) 001 818 993 8007 European representative David Hughes (Netherlands) 0031 297 380 925 |
|
KTP Convolver, Bryce MetaTools 001 805 566 6274 |
PhotoDisc PhotoDisc Europe 0181 255 2900 |
This article first appeared in "The British Journal of Photography", 22/29 July 1998.
IMPORTANT NOTICE
This document is Copyright © 1998 John Henshall. All rights reserved.
This material may only be downloaded for personal non-commercial use. Please safeguard the future of online publishing by respecting this copyright and the rights of all other authors of material on the Internet.
![]()
![]()